
How to Create an Interactive World Map With Clickable Countries in WordPress (No Google Maps or API Keys)
Most WordPress map tutorials start with the same thing: install a Google Maps plugin, get an API key, paste it into a settings page, and hope you do not break anything.
But sometimes you do not want a full street map at all. You just want an interactive world map where visitors can hover over countries, see their names, and click through to specific pages — without external APIs, billing, or heavy scripts.
In this guide, you will learn how to build that kind of map using the free version of the Atlas Maps plugin. You will:
- Install Atlas Maps
- Create an interactive World Map
- Make individual countries clickable
- Customize tooltips
- Embed the map on any page or post
Everything below works with the free plugin. At the end, you will see what extra options you get if you decide to upgrade to Atlas Maps Pro.
What you will build
By the end of this tutorial you will have a world map that:
- Highlights countries when visitors hover them
- Shows the country name (or custom text) in a tooltip
- Lets visitors click specific countries to open a page you choose
You can use that for things like:
- Country directories or regional landing pages
- Travel blogs (visited countries map)
- NGO or company presence by country
What you need
- A WordPress site
- The free Atlas Maps plugin
The free version of Atlas Maps includes three ready-made maps:
- World map
- Map of Europe
- Map of the United States
In this tutorial we will use the World map.
Step 1 – Install and activate Atlas Maps
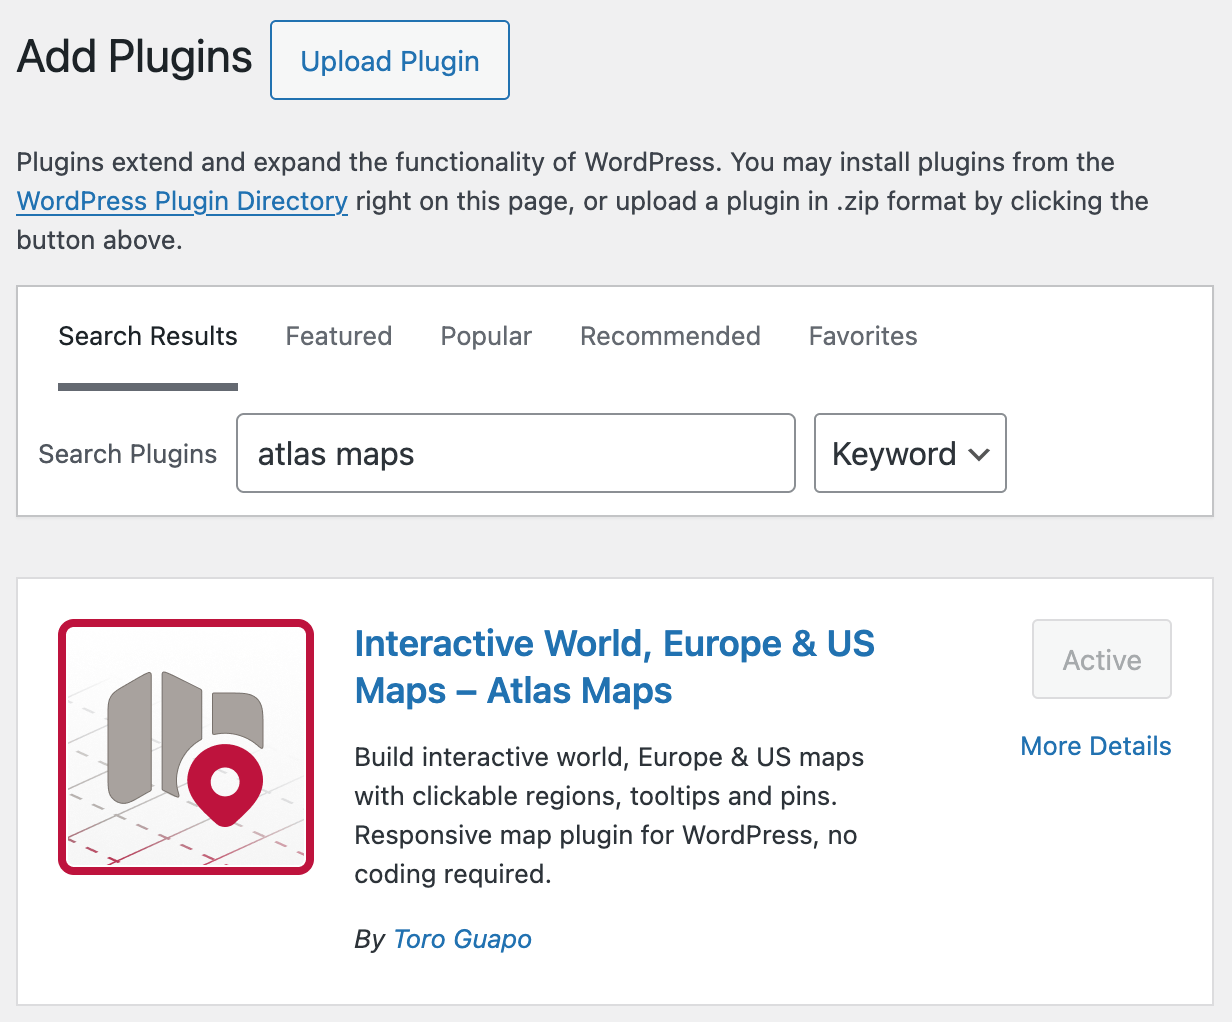
- In your WordPress dashboard, go to Plugins → Add New Map.
- Search for Atlas Maps.
- Click Install, then Activate.
After activation, you should see an Atlas Maps menu item in your WordPress admin. That is where you will create and manage your maps.
Step 2 – Create a new world map
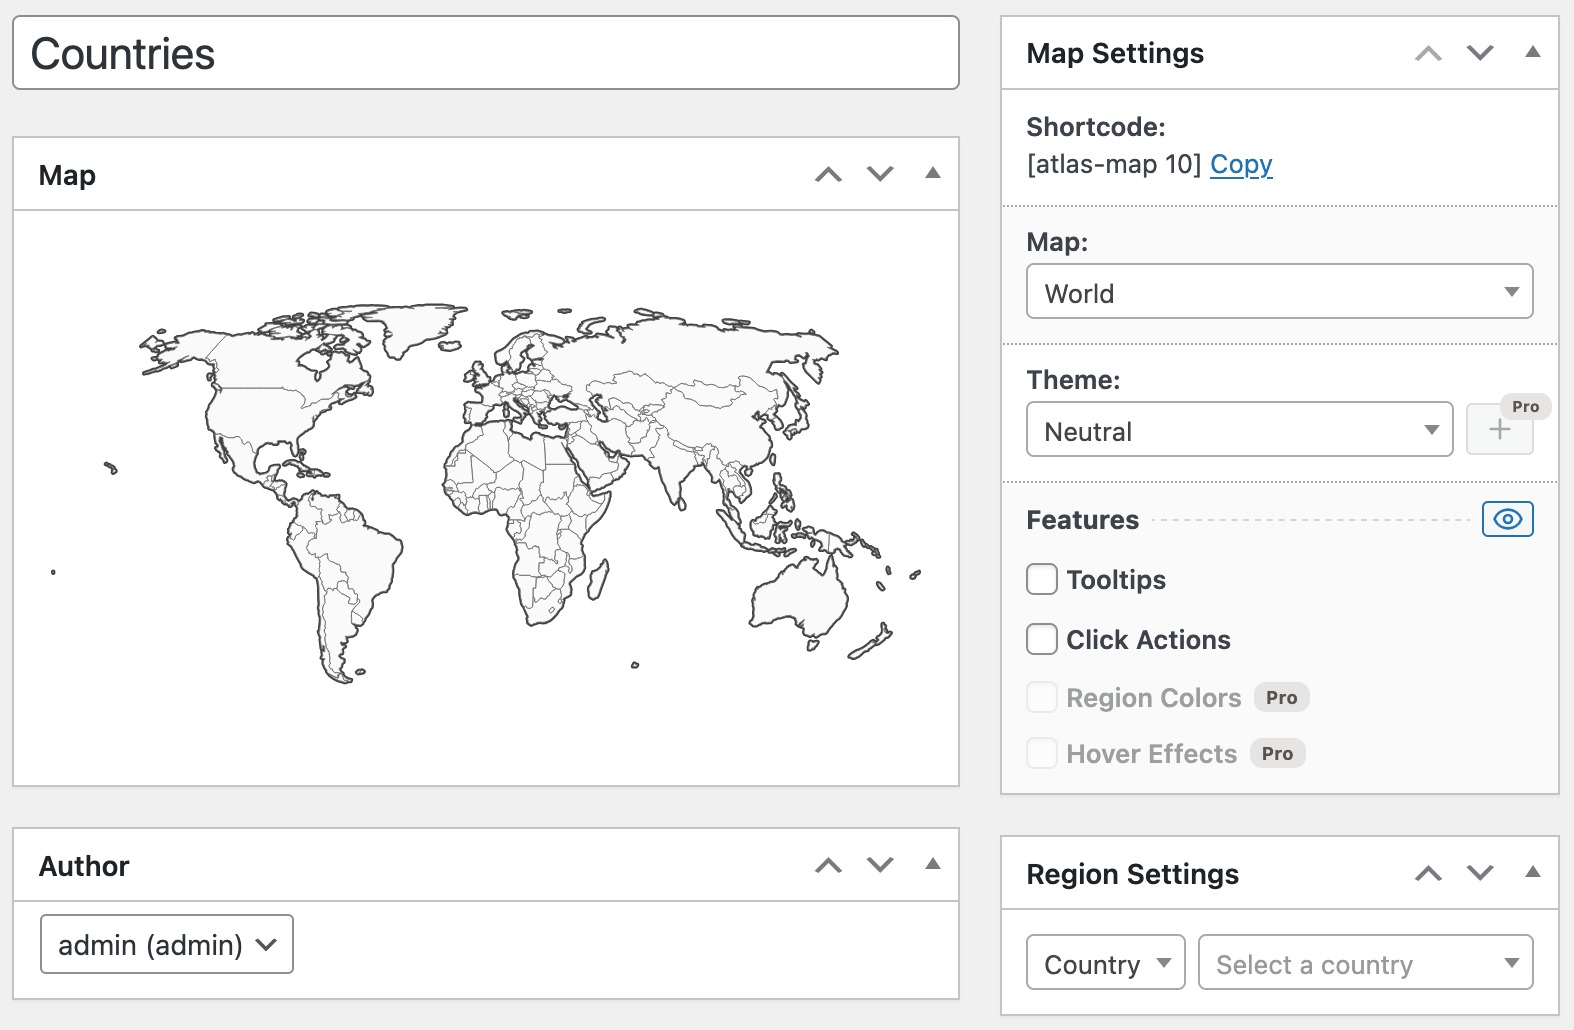
- Go to Atlas Maps → Add New Map.
- Enter a name for your map, for example Countries. This name is just for you; visitors will not see it.
- Look for the Map Settings panel where you choose the map.
- Select World Map from the map dropdown.
You should now see a live preview of the world map in the editor. As you change settings, the preview updates so you can see what you are doing.
Step 3 – Set global map settings
Atlas Maps lets you define global settings that affect the whole map, and then override them for specific countries. It is usually faster to set good defaults first.
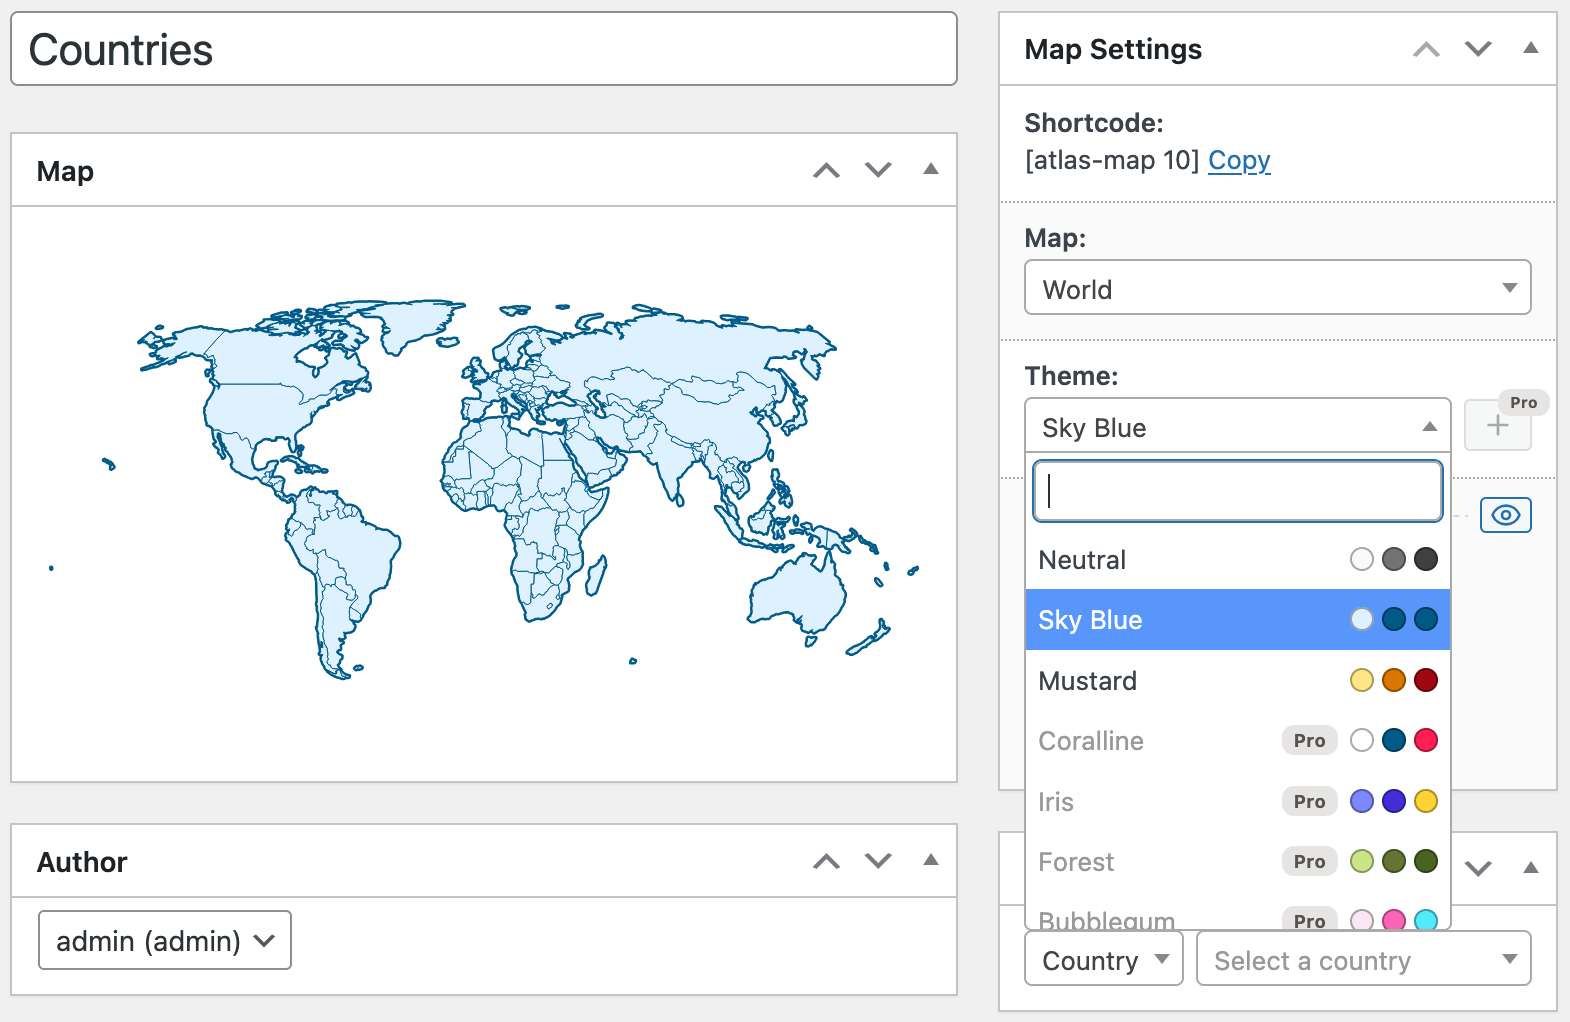
3.1 Choose a theme
Start by picking a theme that fits your site:
- In the map settings panel, find the Theme section.
- Choose one of the built-in themes.
The preview will update immediately. Do not worry too much about getting this perfect now; you can always come back and change the theme later.
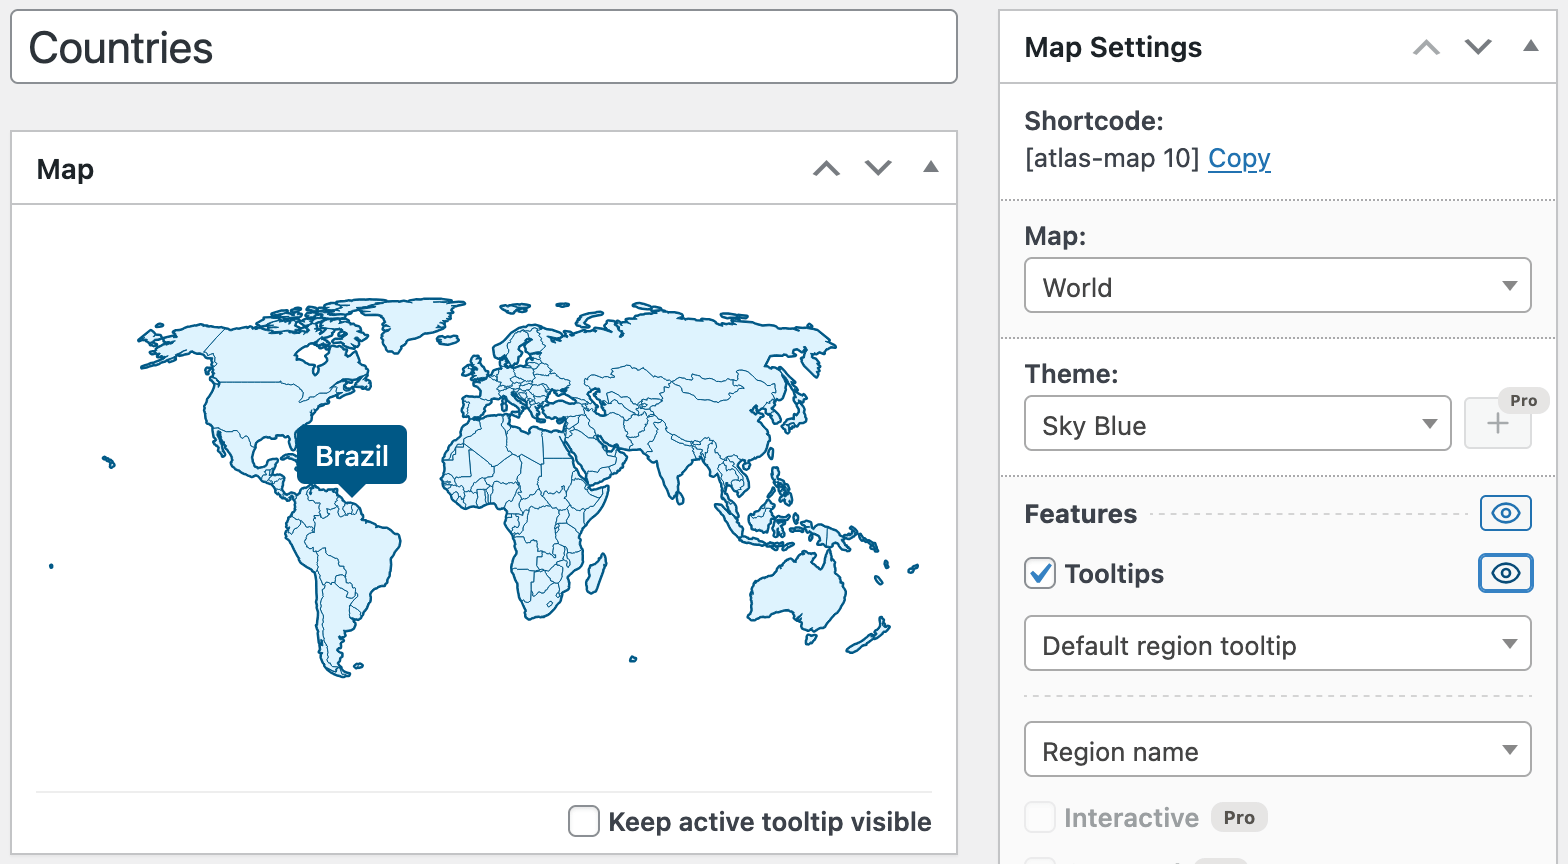
3.2 Enable tooltips
Tooltips are small labels that appear when someone hovers over a country. They are a simple way to make the map more informative.
- In the map settings panel, look for a section called Features.
- Find the Tooltips option and turn it On.
- Choose what you want to show:
- Region name (the country name), or
- Custom text if you want to use your own wording.
With that switch turned on, hovering any country will show its name or your custom text as a tooltip.
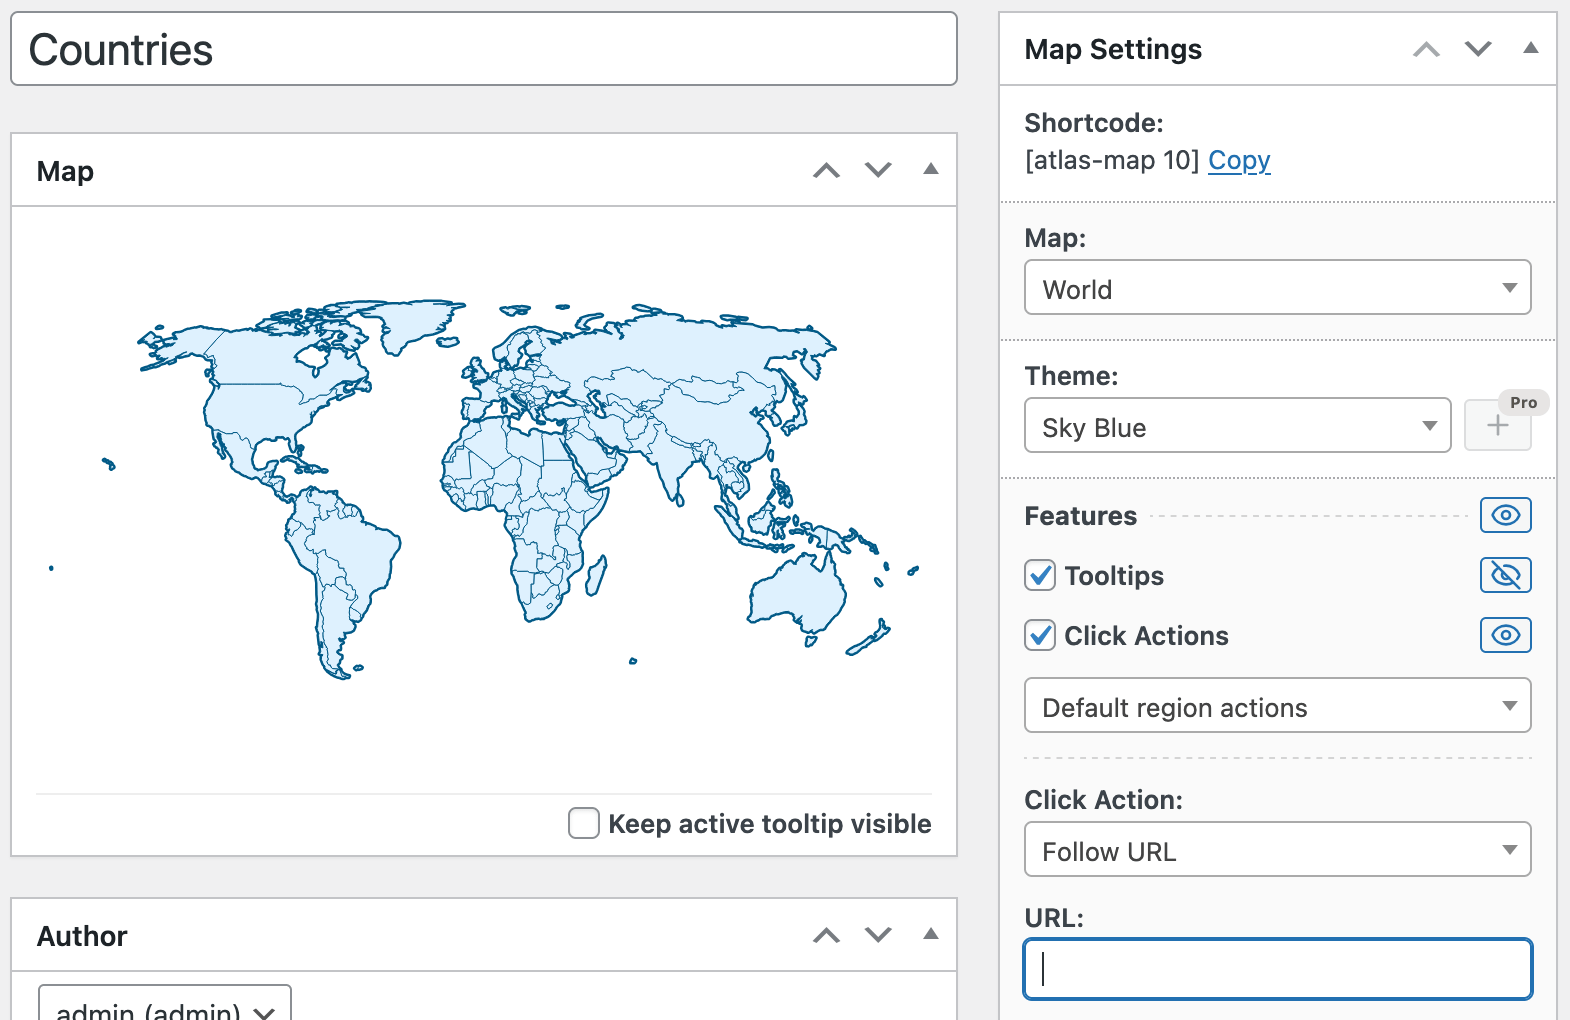
3.3 Decide on the default click behavior
Next, decide what should happen when visitors click a country:
- Do you want every country to go to the same page (for example, a country directory)?
- Or should specific countries go to their own pages?
You can combine both approaches by setting a default and then overriding it for important countries.
To set a global click action:
- In map settings, find the Click Actions section.
- Turn click actions On.
- Set the action to Follow URL.
- Enter a default URL, for example your main countries page.
Later you will override this default for countries that need their own pages.
Step 4 – Make individual countries clickable
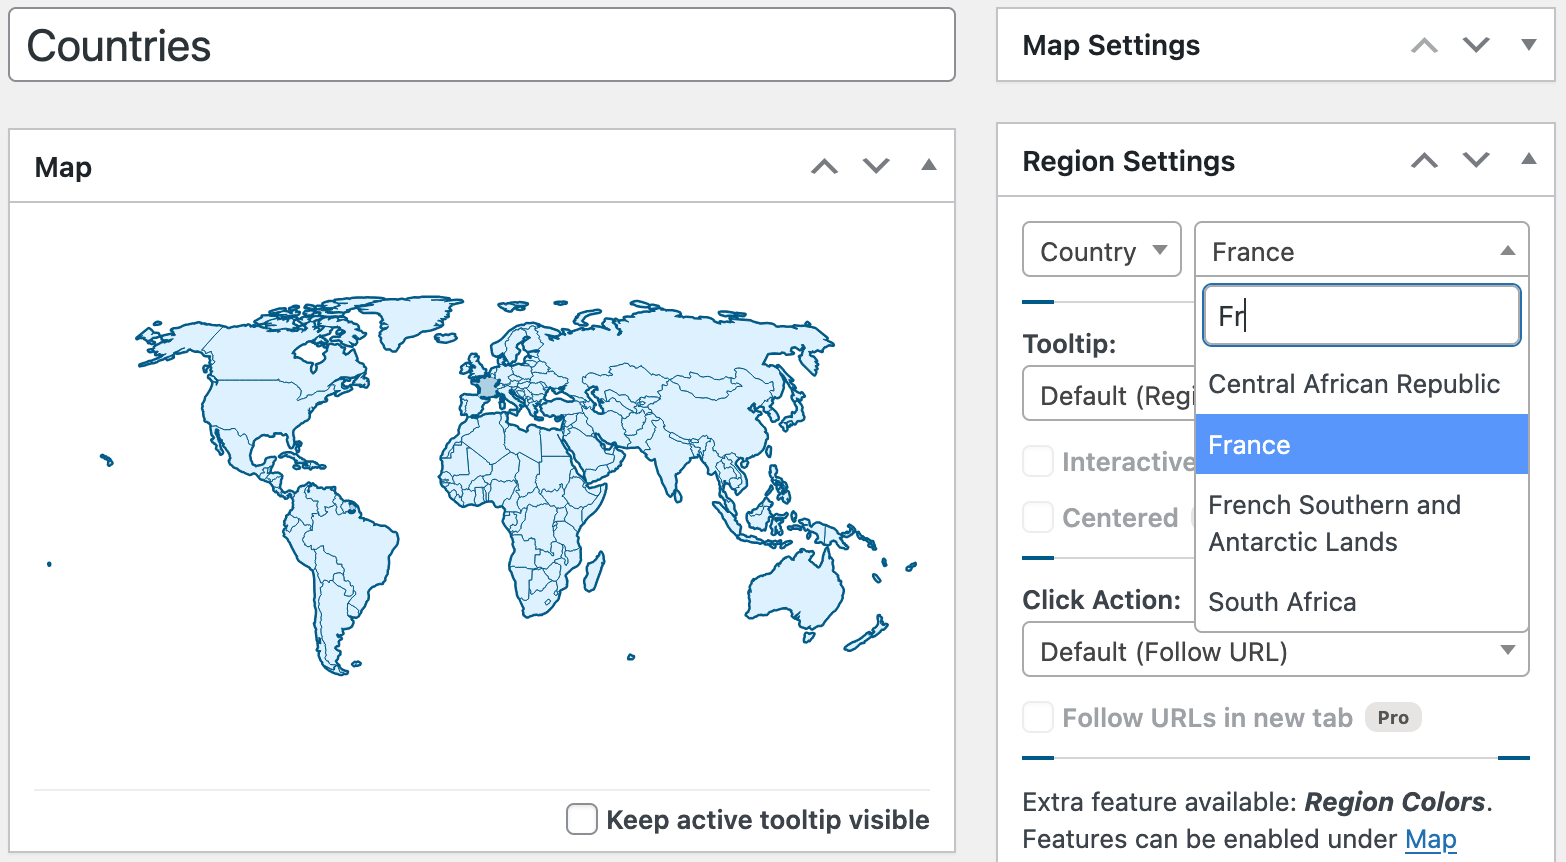
Now you can tell Atlas Maps which country should go to which page.
This is done in the Region Settings panel, which controls individual countries or regions.
- In the sidebar, open Region Settings.
- Use the search box or list to find a country, for example France.
- Select that country so its settings appear.
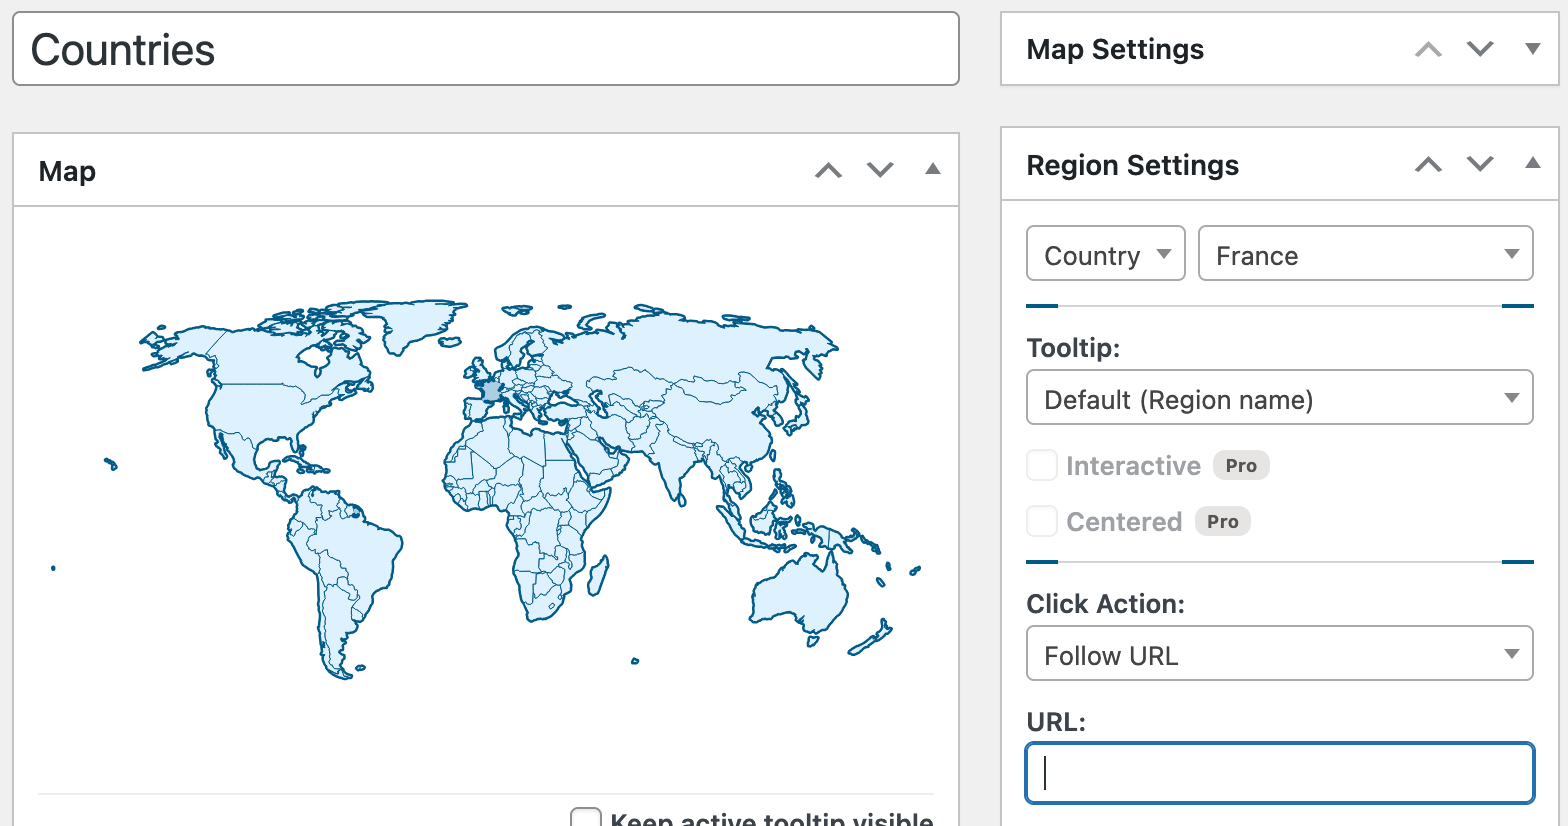
For a specific country:
- Find the Click Action settings for that region.
- Change the action from Default to Follow URL.
- Enter the URL for that country, for example:
https://example.com/country/france/ - Save or update the map.
Repeat this for each country that needs its own landing page. You do not have to configure every country:
- Let most countries use the global click action (for example, a general countries page, or nothing).
- Override only key countries with their own URLs.
Step 5 – Customize tooltips per country (optional)

By default, tooltips show whatever you configured in the global settings (for example, the country name). Sometimes you might want specific text for a particular country.
To change the tooltip for a single country:
- In Region Settings, select the country you want to edit.
- Find the Tooltip options for that region.
- Change it from Default to Custom text.
- Enter the text you want, for example:
- "France – Headquarters in Paris"
- "Germany – Offices in Berlin and Munich"
- Update the map.
When you preview the map, hovering that country will now show your custom tooltip instead of the default.
Step 6 – Embed the world map in a page or post
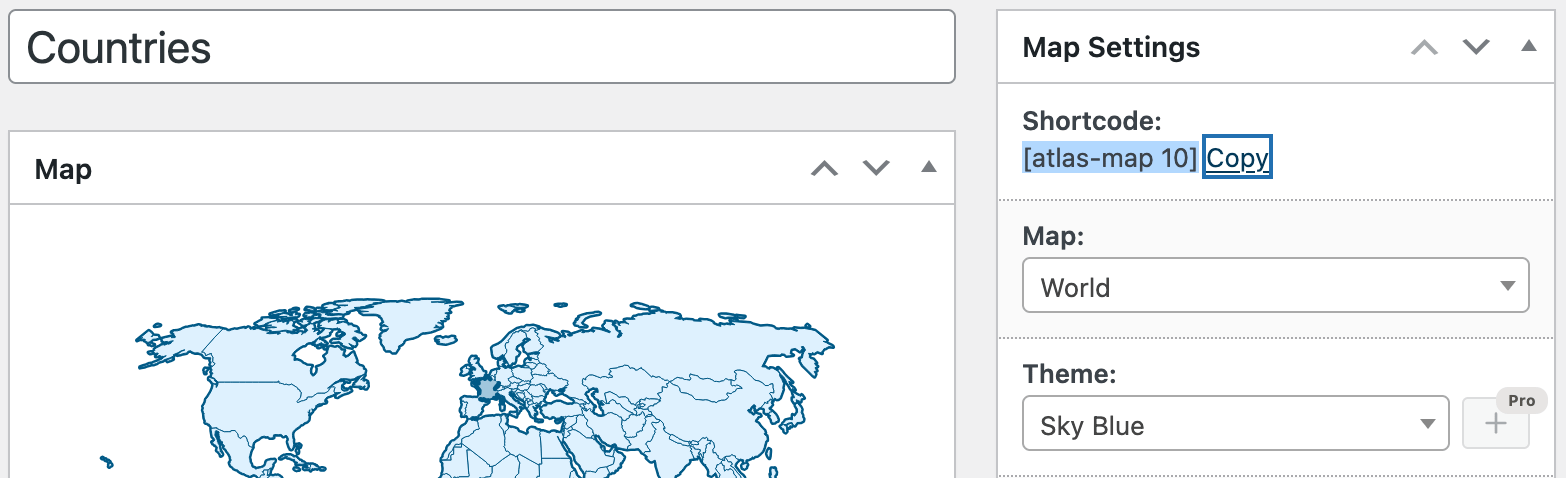
Once your map looks good, it is time to put it on your site.
- Click Publish or Update on the map editor so your changes are saved.
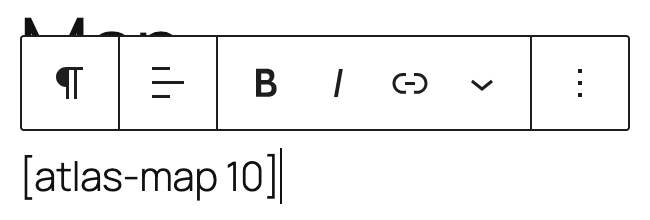
- Under map settings, you will see a shortcode for this map, for example:
[atlas-map 10] - Copy that shortcode.
- Go to Pages → Add Page (or open an existing page).
- In the block editor:
- Add a Shortcode block.
- Paste the shortcode into it.
- Save or update the page and preview it on the front end.
You should now see your interactive world map on that page. Hovering countries will show tooltips, and clicking configured countries will open the right URLs.
Step 7 – Add pins for specific locations (optional)
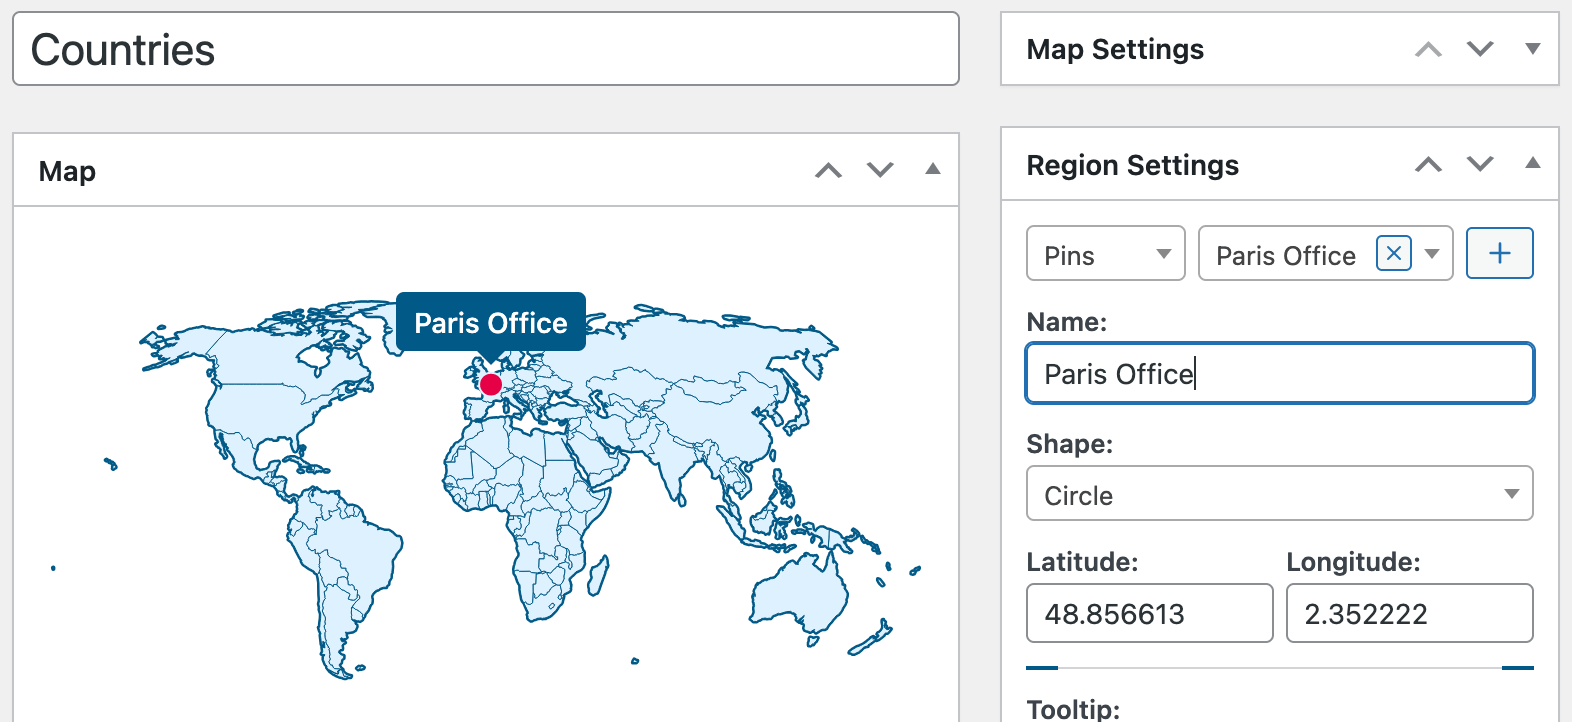
Countries are great for high level information, but sometimes you need to mark exact locations like offices, project sites, or event venues.
Atlas Maps lets you add pins on top of the map:
- Open your map in the Atlas Maps editor.
- In Region Settings, look for a Pins section.
- Add a new pin and give it a name, for example Paris Office.
- Set its position on the map.
- Optionally, set a custom tooltip for the pin (for example, address or opening hours).
- Update the map and refresh your page to see the new pin.
Pins are useful for:
- Marking individual offices within a country
- Showing project or campaign locations
- Highlighting specific cities on a travel map
Going further with Atlas Maps Pro
If you like what the free version can do but need more detail or control, Atlas Maps Pro adds extra features on top of the same interface. You do not have to relearn anything; you just get more options.
More maps
- Dedicated maps for many individual countries, not just the world, Europe, and the US
- For the US: state-level detail
Richer tooltips and interactivity
- Tooltips with rich text, images, and links
- Interactive tooltips that stay open when hovered, so visitors can click links or select text
- Options to control tooltip positioning and behavior in more detail
Advanced styling and theming
- More built-in themes to choose from
- A theme builder to fine tune colors, borders, hover effects, and shadows
- Detailed control over pin appearance (colors, borders, shapes, etc.)
Extra click options
- Open links in the same tab or a new tab
If you find yourself often needing country or state level detail, extra styling options, or richer tooltips, it is worth looking at the Pro version.
Troubleshooting tips
The map does not appear on the page
- Make sure the map is published, not still a draft.
- Check that you copied the correct shortcode.
- If you are using a page builder, make sure the shortcode is in a block or widget that actually renders shortcodes.
Clicking a country does nothing
- Check that Click Actions are enabled globally or for that specific country.
- Make sure the URL for that country is filled in and valid.
- If you are overriding the global action, make sure the region is set to use its own click settings.
Tooltip text is not what I expect
- Verify if the region is using the global tooltip settings or custom text.
- If you changed the global tooltip mode, revisit any countries where you set a custom tooltip earlier.
Wrap up
You do not need Google Maps, API keys, or heavy external scripts to add an interactive world map with clickable countries to your WordPress site. With the free Atlas Maps plugin you can:
- Create a world map with hover effects and tooltips
- Send visitors to specific country pages when they click
- Add pins for precise locations
- Embed the map anywhere using a simple shortcode
Once you have your first map working, you can reuse the same steps for maps of Europe or the United States, or create separate maps for different sections of your site.
If you need more detail, more maps, or more styling options, you can always explore Atlas Maps Pro later. For now, you already have a clean, interactive world map running in WordPress without touching Google Maps at all.